Seerlight
Couldn't load pickup availability


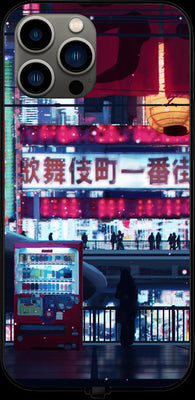
Cyberpunk Streets RGB LED Protective Phone Case for iPhone and Samsung Models
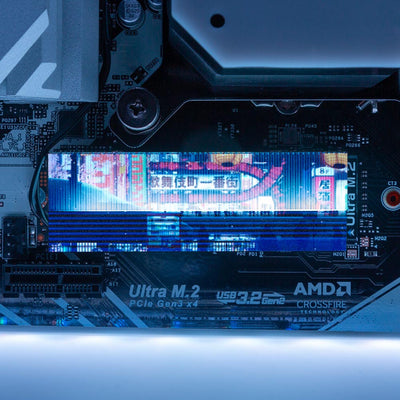
Cyberpunk Streets M.2 Heatsink Cover with ARGB Lighting

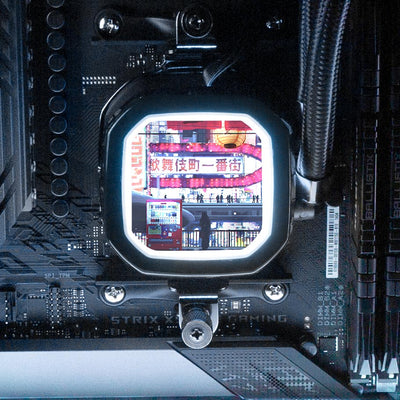
Cyberpunk Streets AIO Cover for DeepCool Castle 240EX 280EX 360EX Addressable RGB
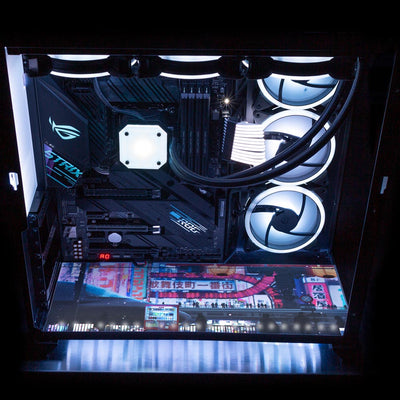
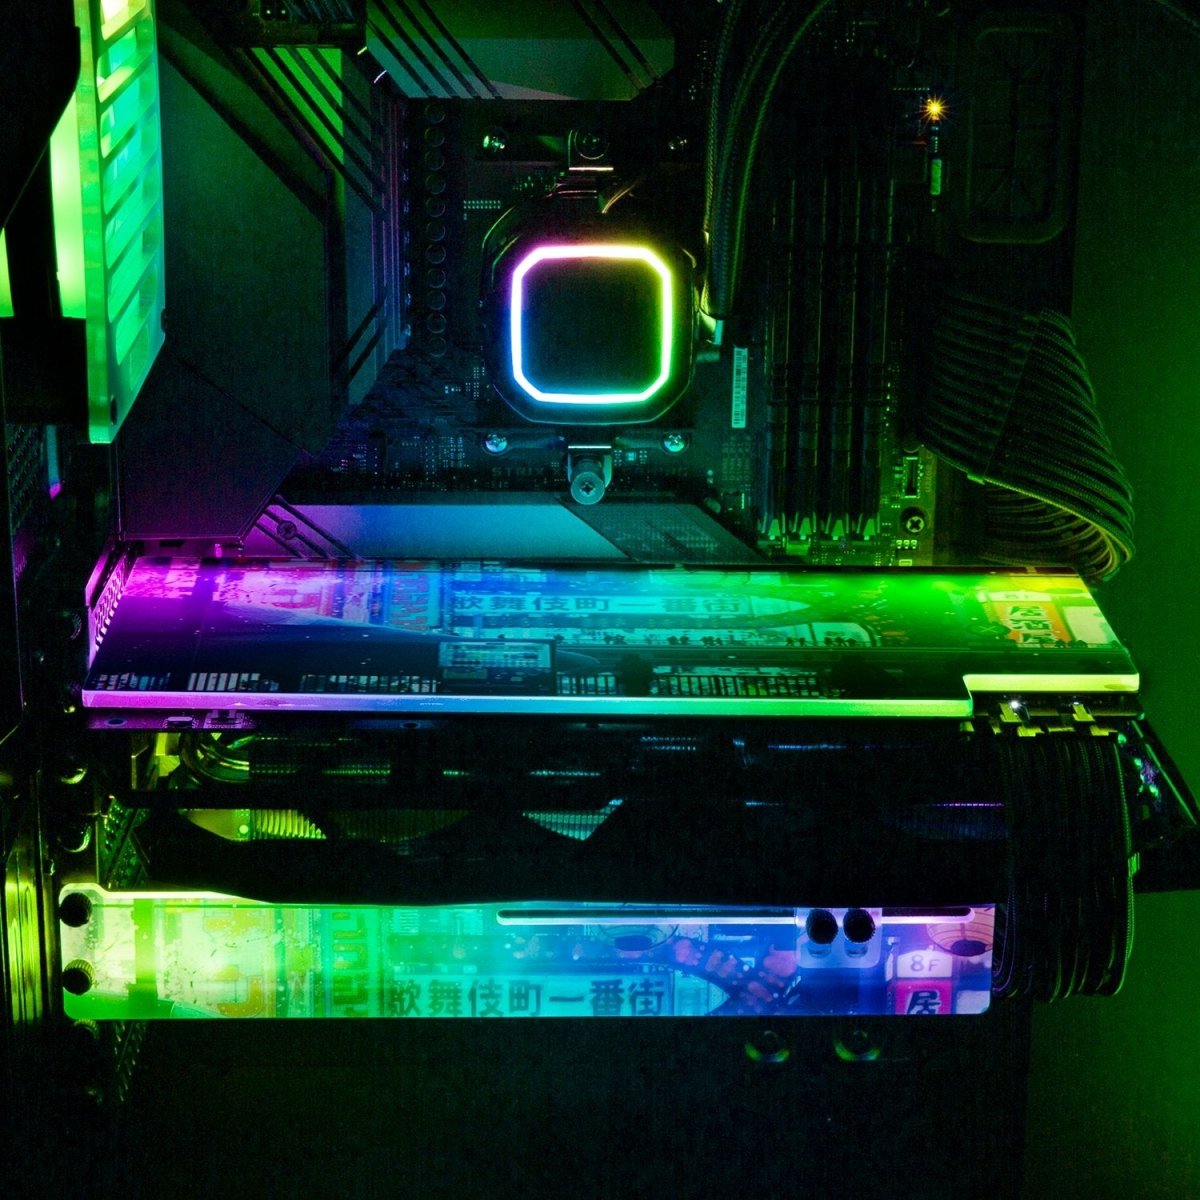
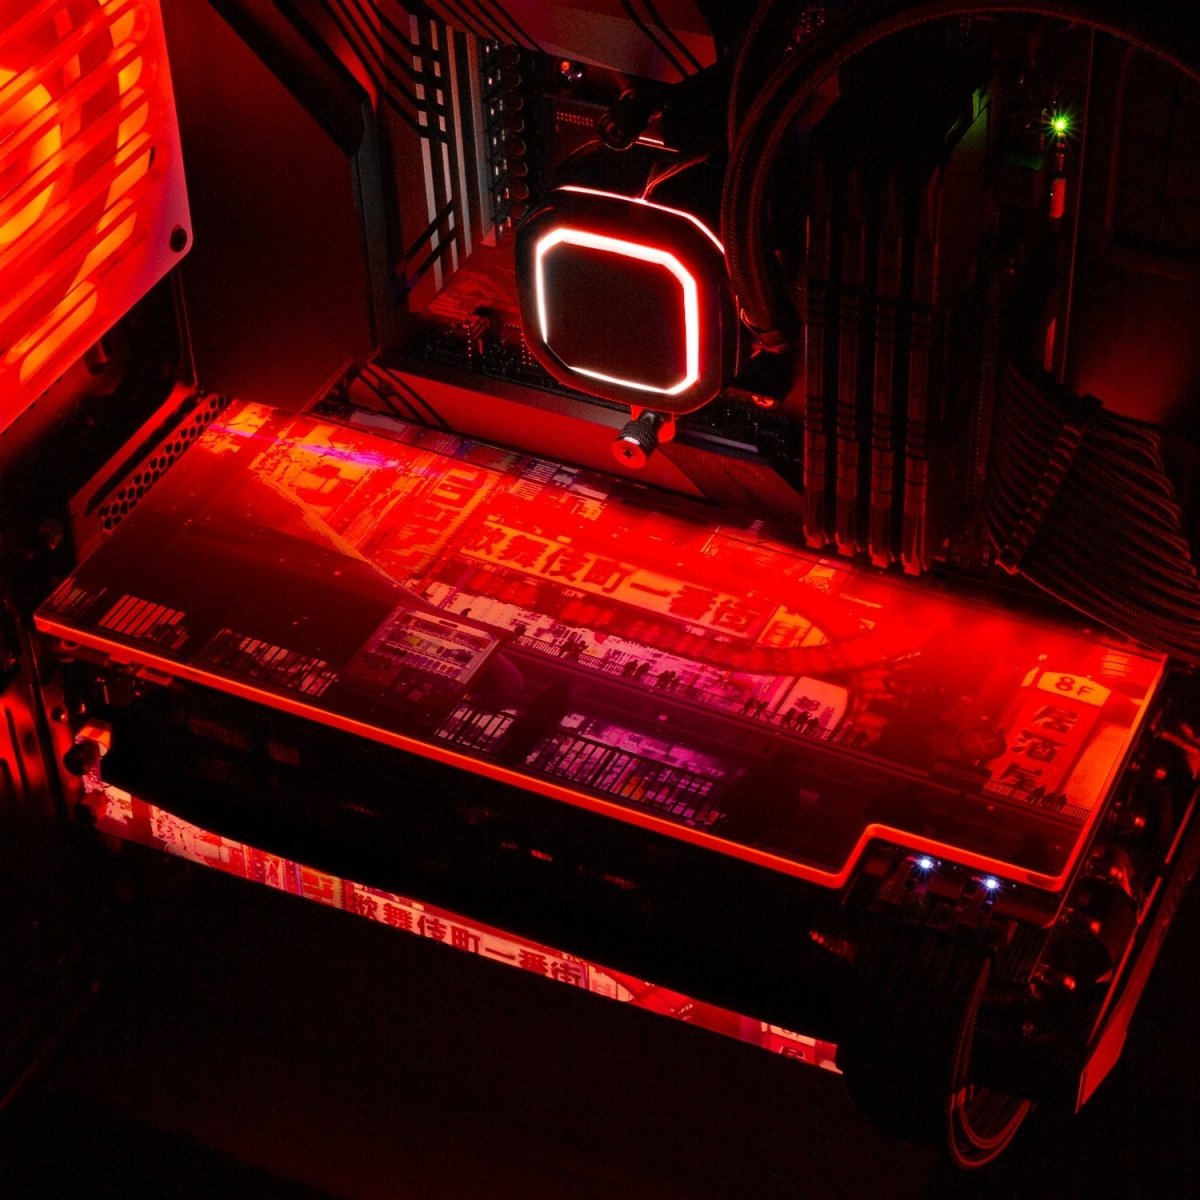
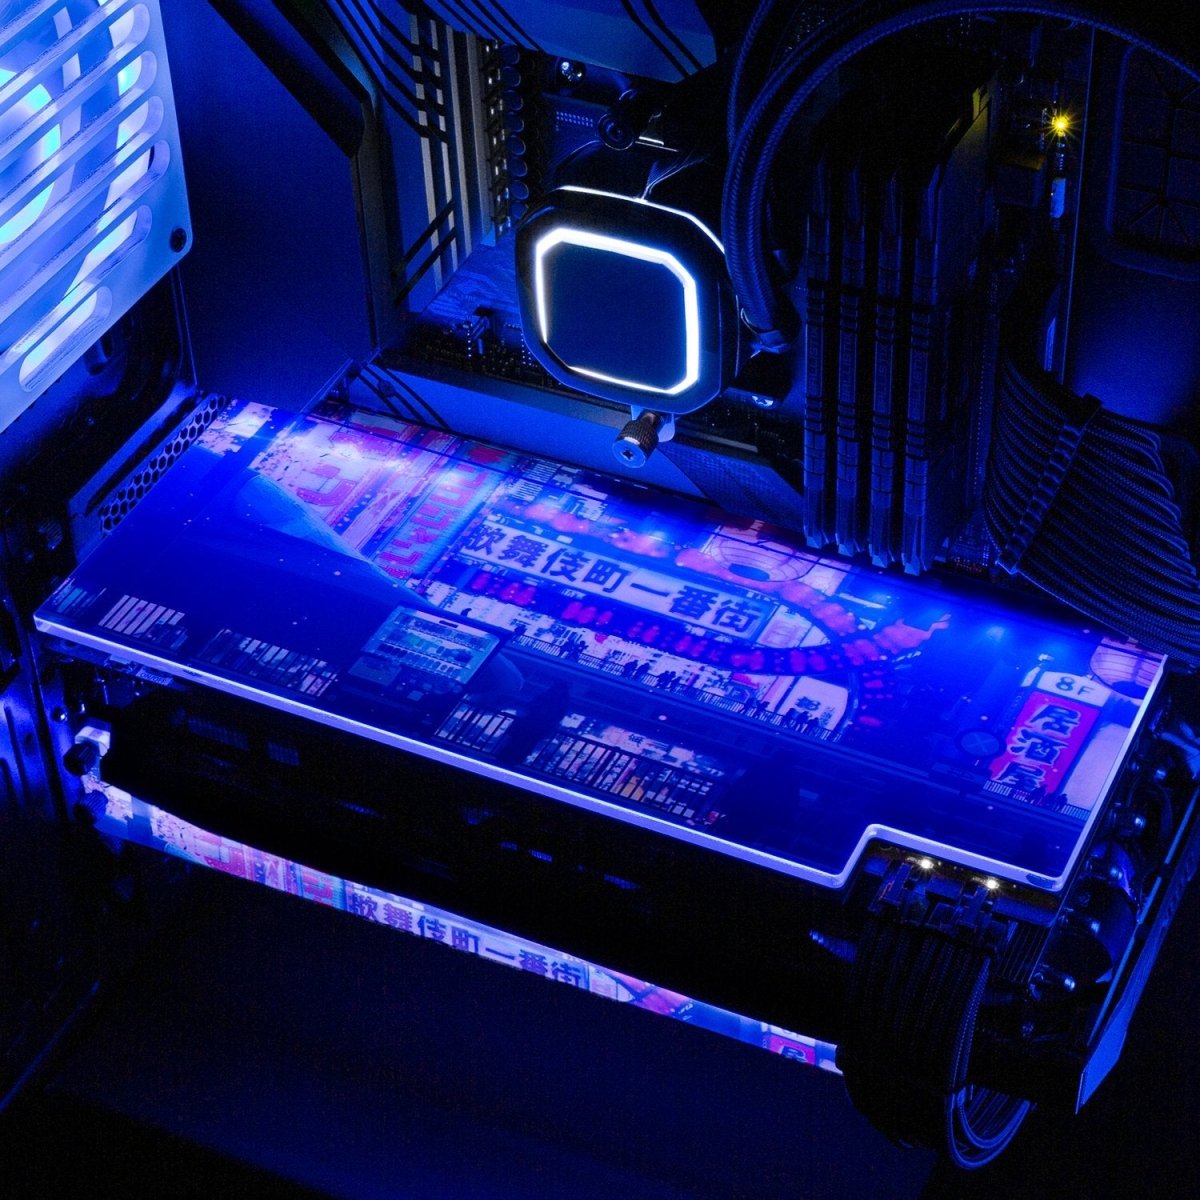
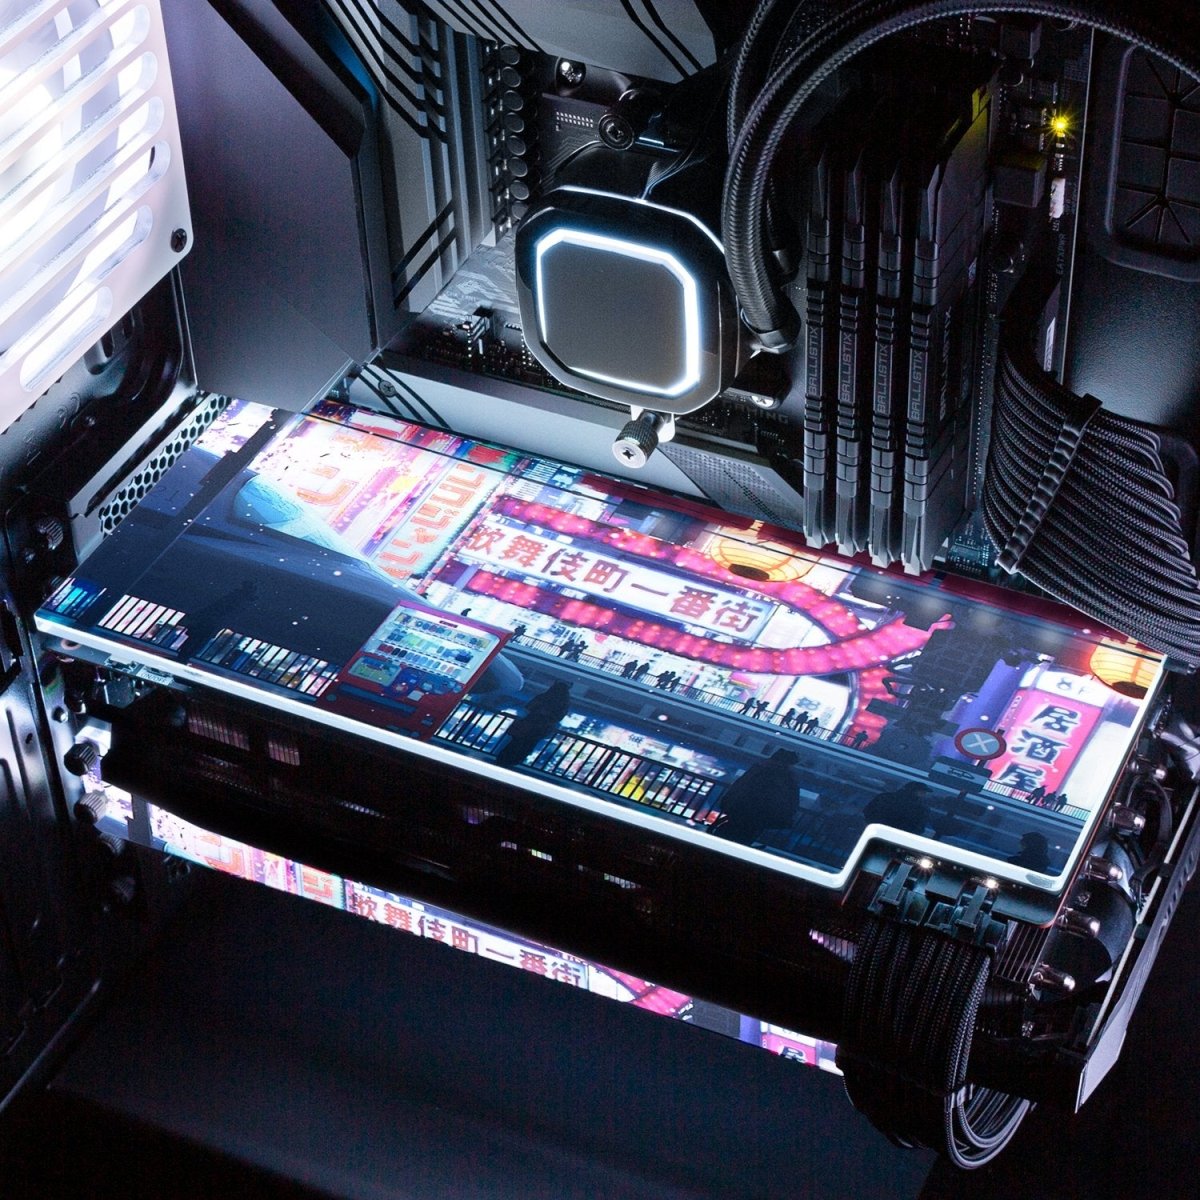
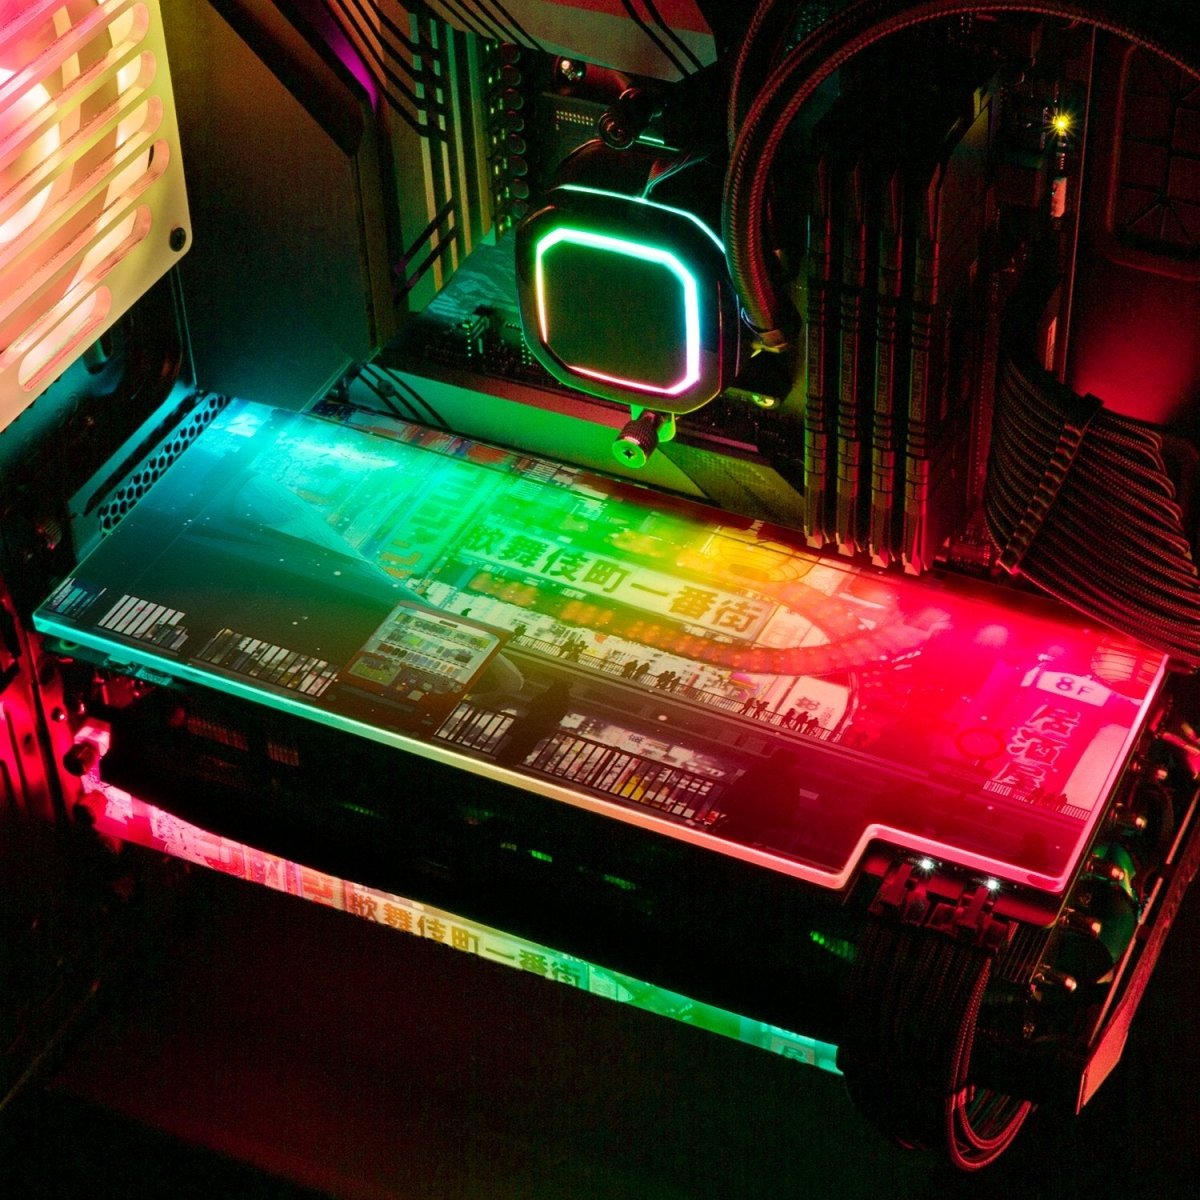
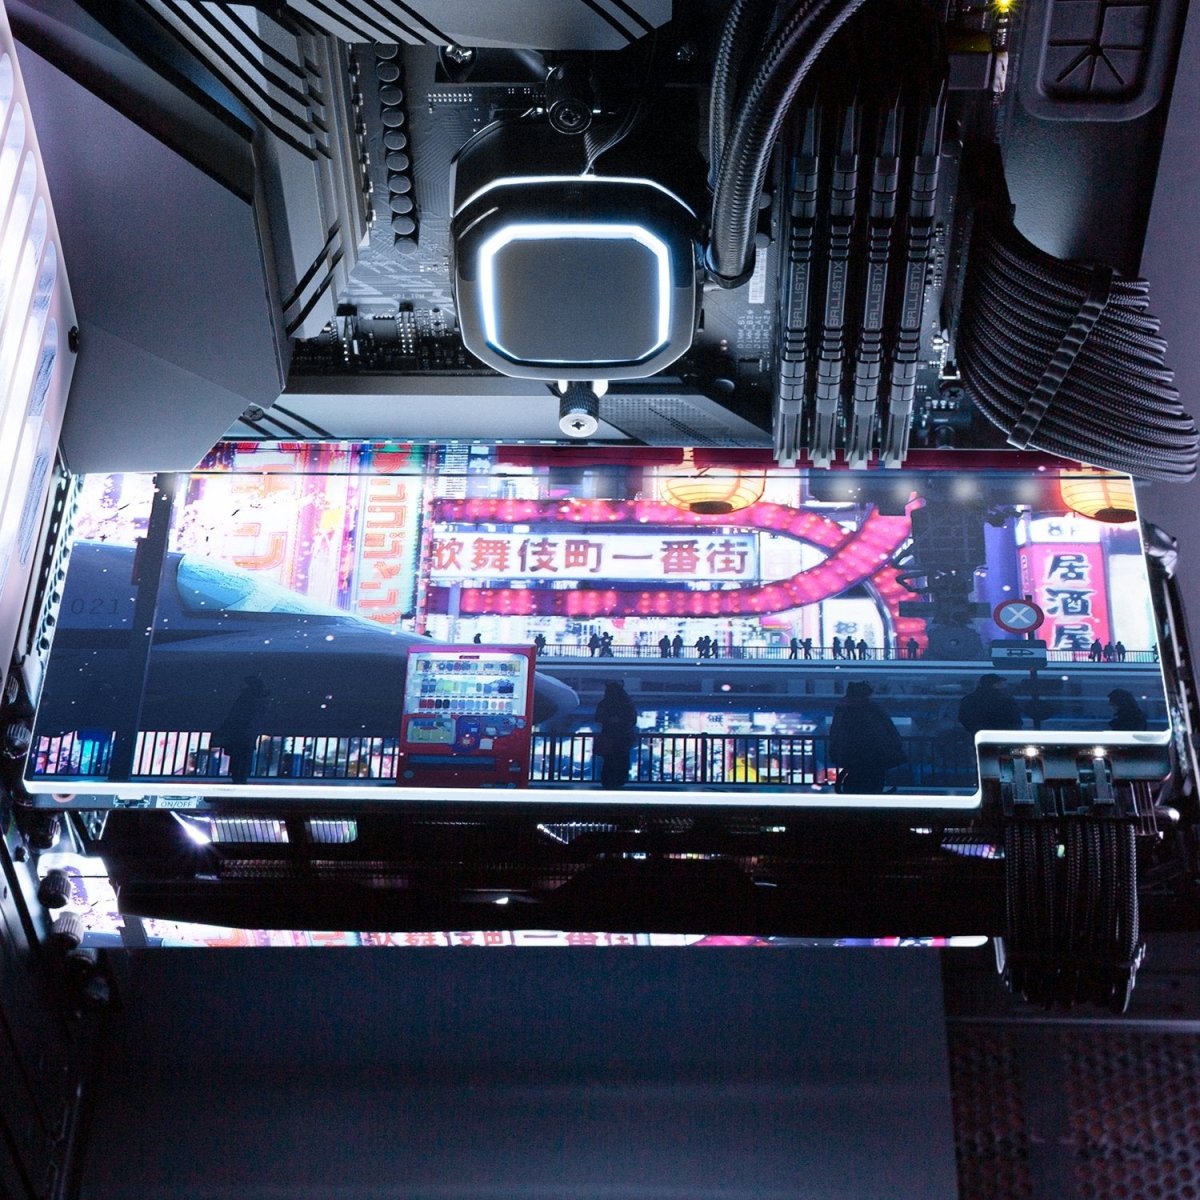
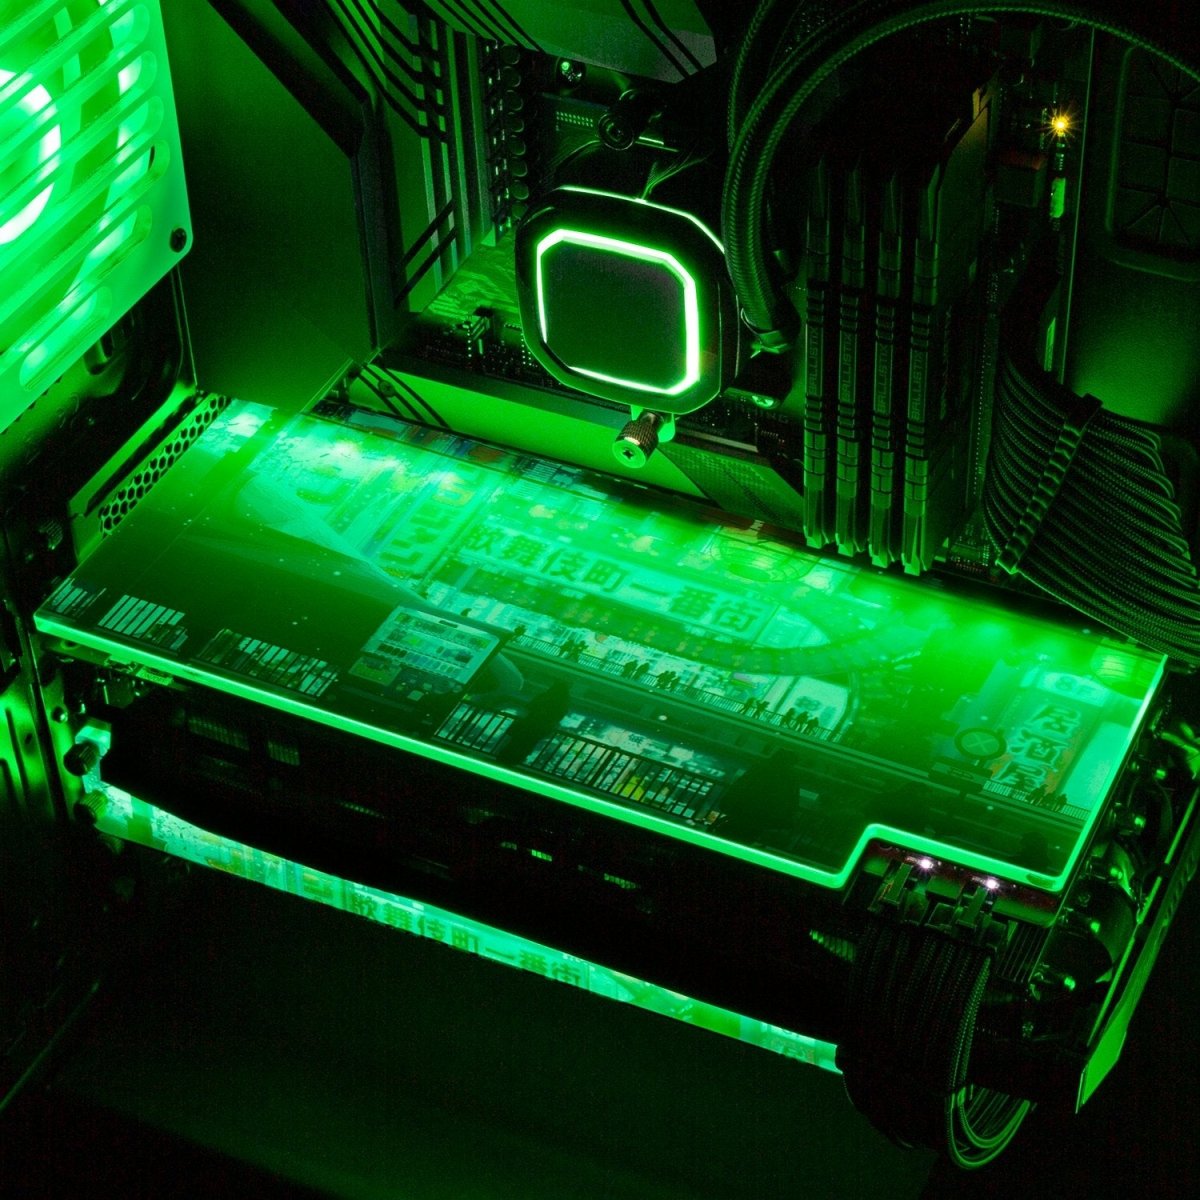
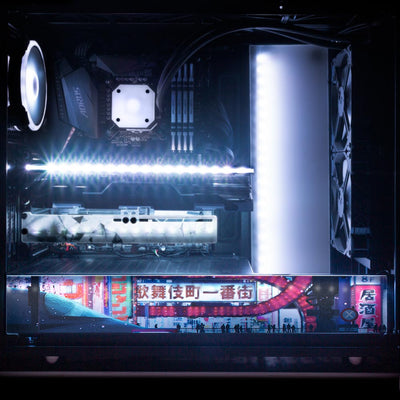
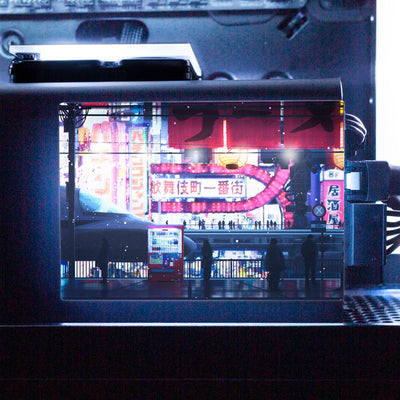
Cyberpunk Streets Lian Li O11 Dynamic and XL Bottom Panel Plate Cover with ARGB LED Lighting
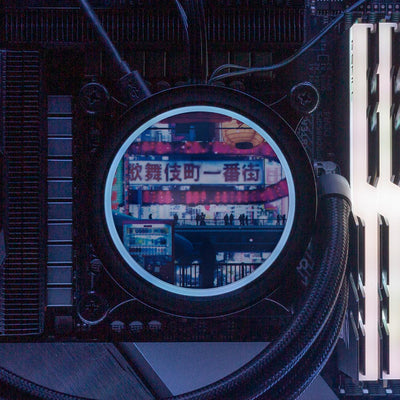
Cyberpunk Streets AIO Cover for NXT Kraken M22 X53 X63 X73 RGB 120,240,280, and 360mm
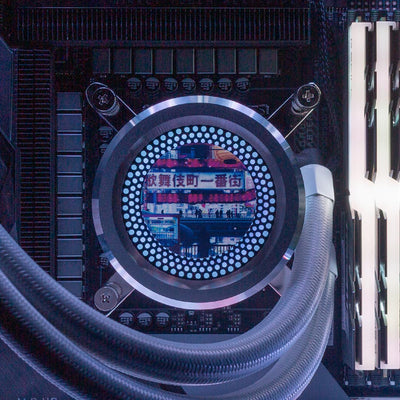
Cyberpunk Streets AIO Cover for Small Circle of Lian Li LIAN LI GALAHAD AIO240 360 RGB BLACK and White

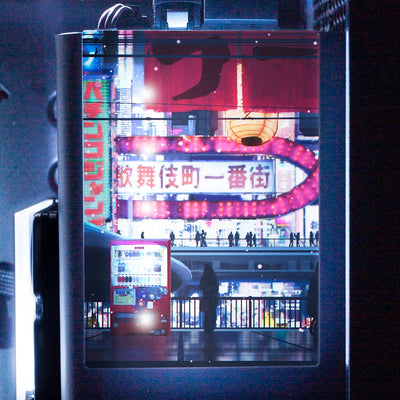
Cyberpunk Streets Lian Li O11 and Dynamic and XL Rear Panel Plate Cover with ARGB LED Lighting

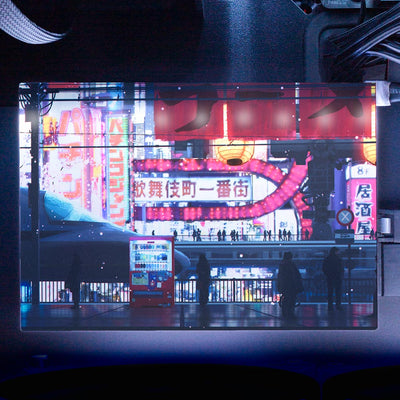
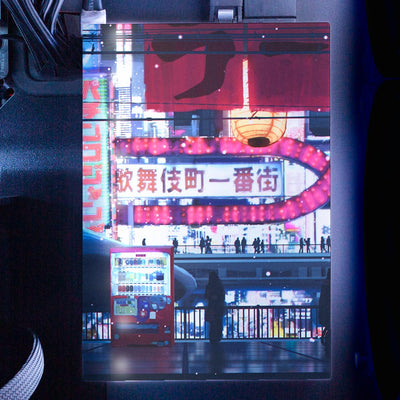
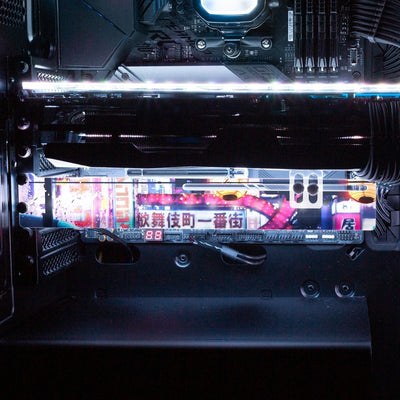
Cyberpunk Streets Plexi Glass Wall Art
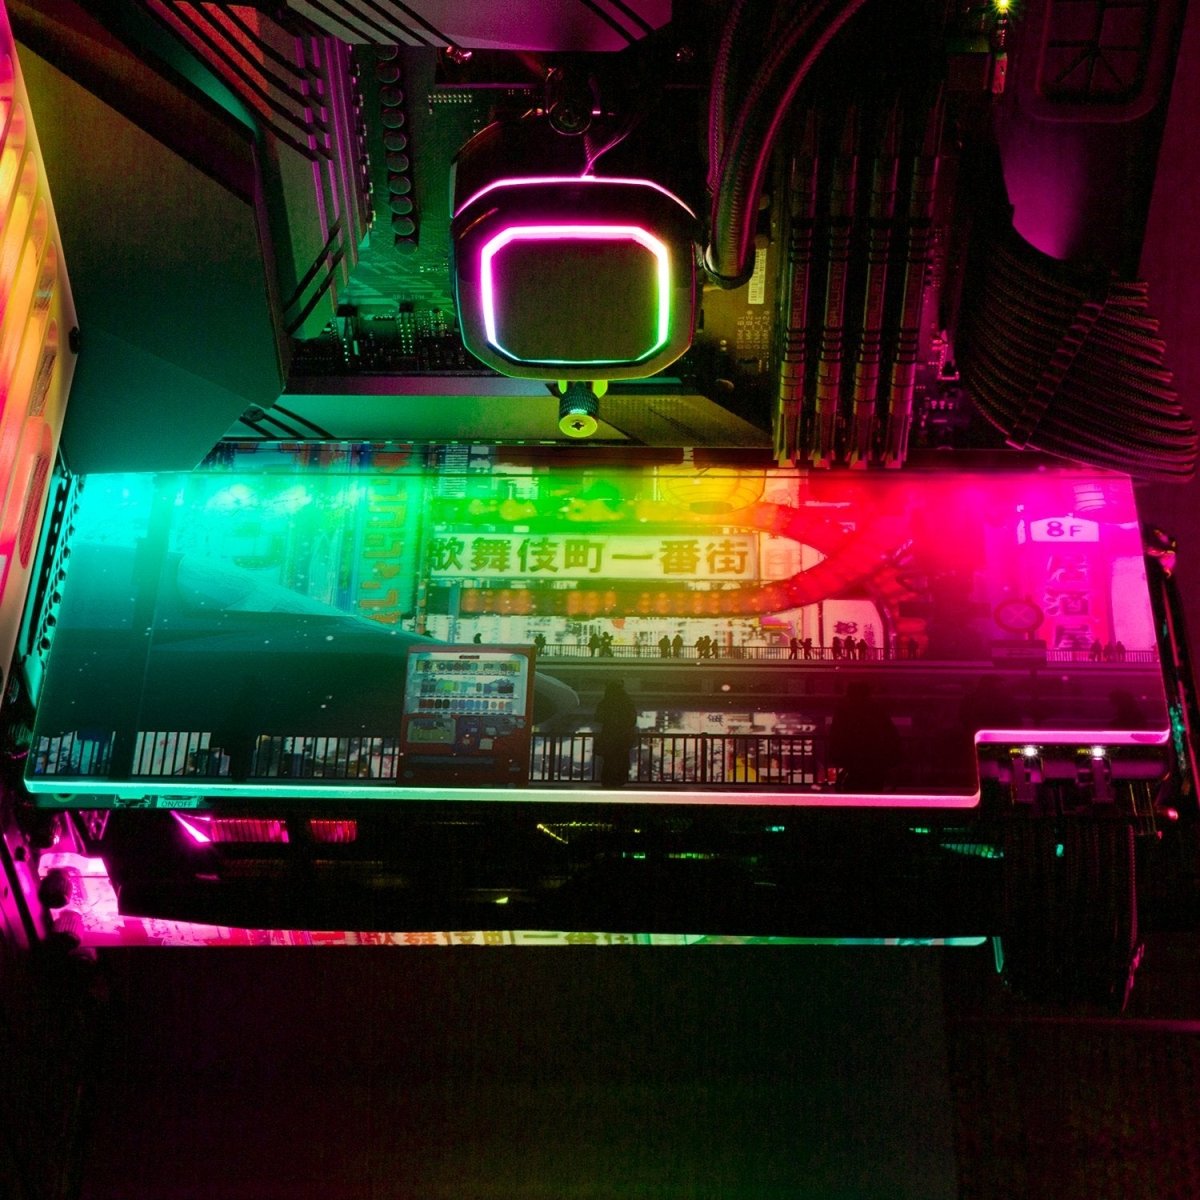
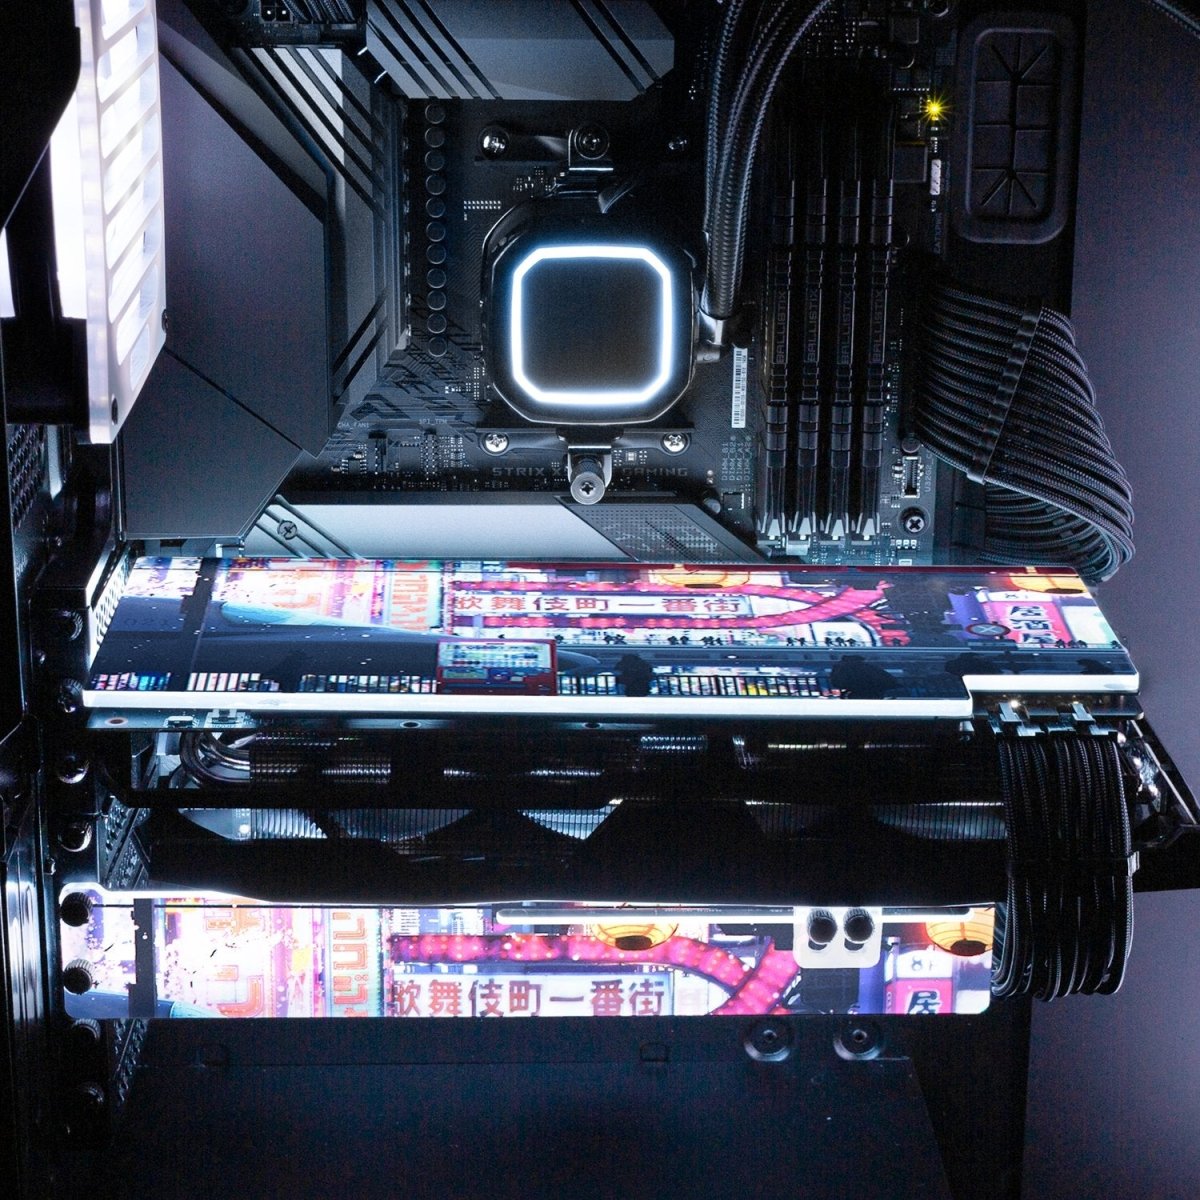
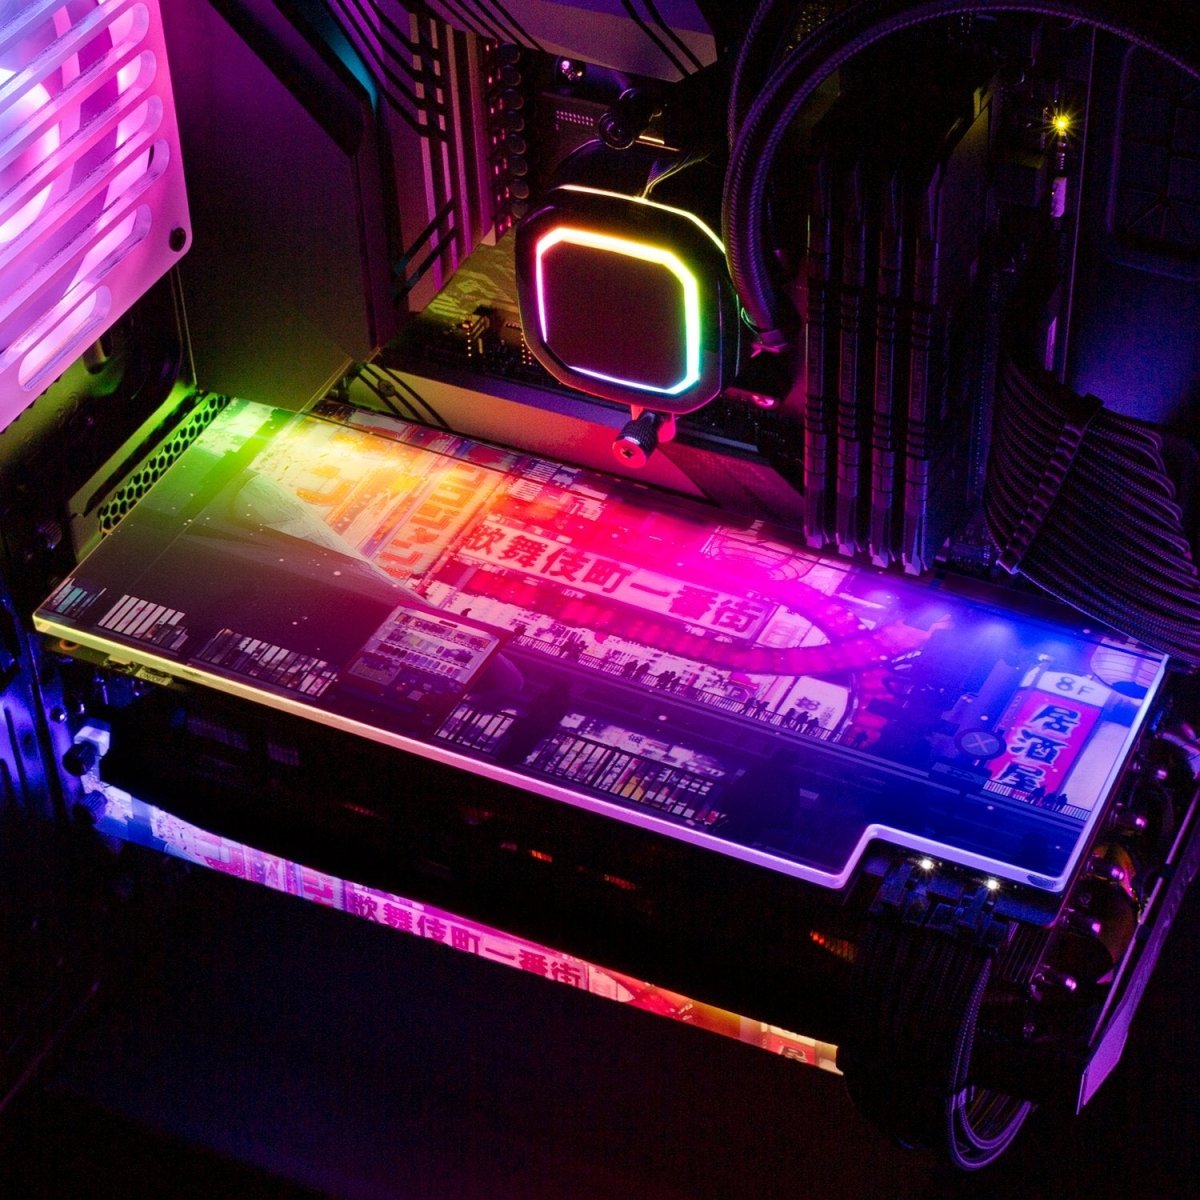
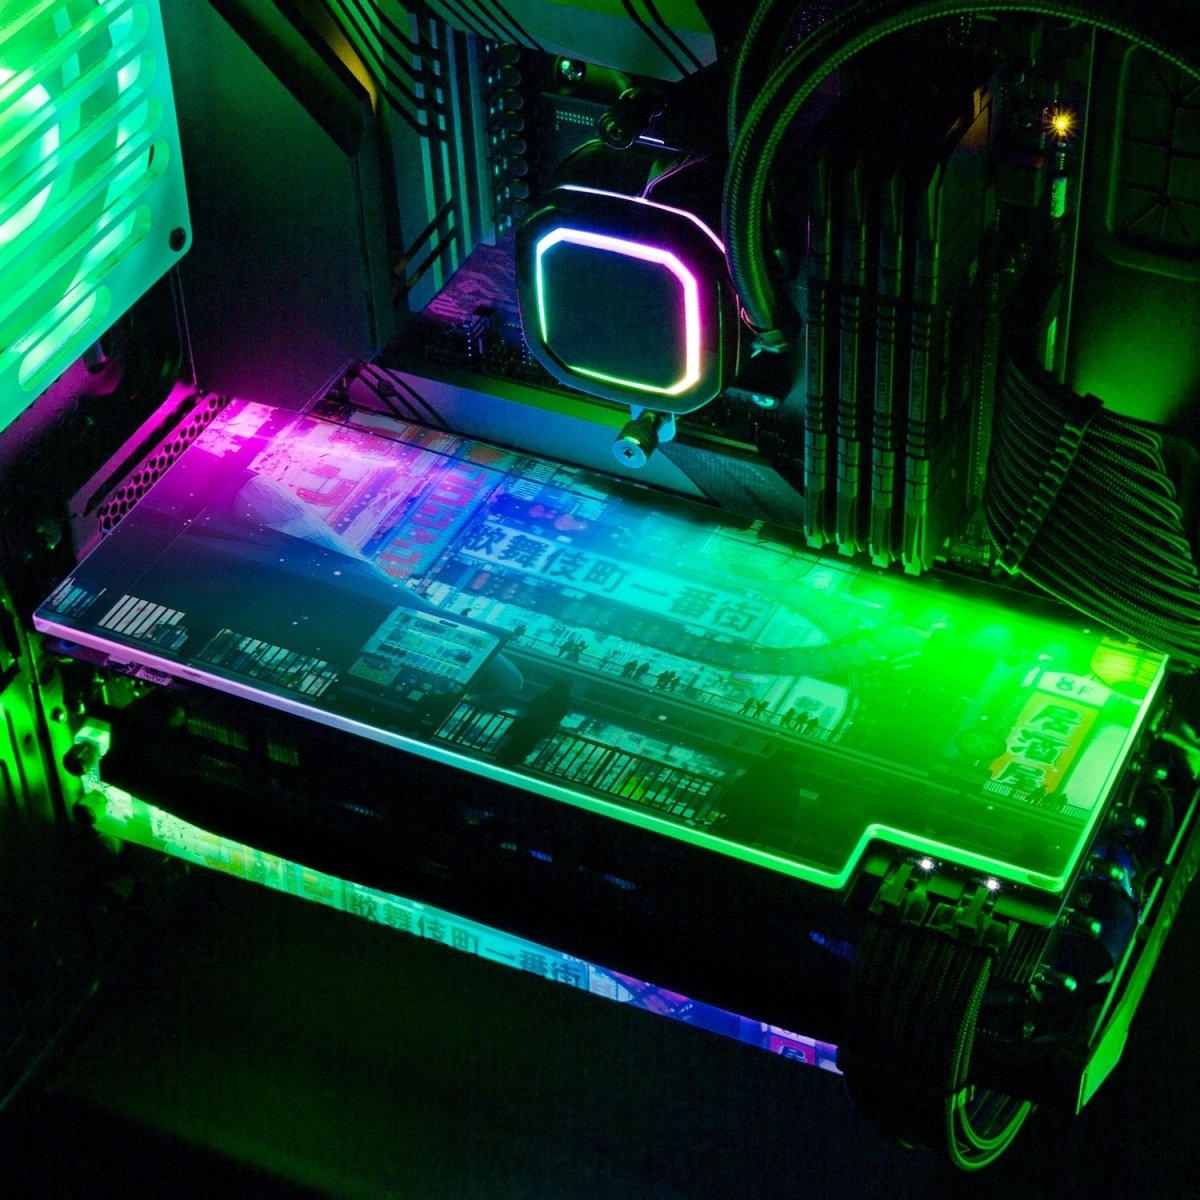
Cyberpunk Streets RGB PSU Shroud Cover

Cyberpunk Streets Windmill Fan Grill (120mm and 140mm)

Cyberpunk Streets AIO Cover for Corsair iCUE ELITE CAPELLIX (H100i, H115i, H150i Black and White)
Cyberpunk Streets AIO Cover for Corsair RGB Hydro Platinum and Pro Series (H100i, H115i, H150i, H100X, XT, X, SE, H60)
Cyberpunk Streets RGB SSD Cover Horizontal
Cyberpunk Streets RGB SSD Cover Vertical
Cyberpunk Streets RGB HDD Cover Horizontal
Cyberpunk Streets RGB HDD Cover Vertical
Cyberpunk Streets RGB GPU Support Bracket